Saturday, March 15, 2014

How to Install and Mount A Bathroom Faucet and Drain Assembly

Step 1: Remove Old Faucet and Drain Assembly

It's a good idea to replace the drain when you replace a faucet. If you do replace the drain, also consider replacing the P-trap and drain tailpiece at this time.
In our project, we removed a bathroom faucet and replaced it with a new pop-up drain and faucet.

Step 2: Install the Faucet

Depending on the type of faucet you install, a 4" faucet with an escutcheon plate or an 8" faucet without an escutcheon, follow these specific instructions.
Small faucet: Place plumber's tape or joint compound on the threads of the faucet stems. If the faucet includes a rubber gasket, install it on the base of the faucet before inserting the faucet stems in the appropriate holes in the sink. If your faucet doesn't include a gasket, run a line of caulk under the faucet before installing it so it squeezes out a bit as you put the faucet in place. Use a wet rag to wipe up excess caulk.
Secure the nuts under the faucet that hold it to the sink, making sure the plate and faucet stem is properly aligned. Tighten the nuts by hand first before giving them another quarter-turn with a wrench.
Connect the water supply lines to the faucet stems. Apply plumber's tape to the shutoff valve threads. Tighten the coupling nuts to the faucet supply stems, taking care not to over tighten.
Large faucet: Wrap plumber's tape around the threads of the hoses leading from the valves to the spout. Attach the hose to the end of the valve assembly.
Thread the valve through the appropriate hole and firmly tighten the nut underneath the sink. Caulk around the base of the spout and thread the connections through the center hole. Attach the hoses to the spout from underneath and tighten the connection with an adjustable wrench.
Attach the water supply lines. You may need to reduce the length of the lines after you attach the sink to the wall.
Dry-fit the sink and mark the mounting holes underneath the sink. Remove the sink and drill the mounting holes.
Connect the water supply lines to the shutoff valves.
Connect the drain assembly to the drain in the wall. You may want to use a flexible adapter. Tighten the connections with a wrench.

installing a faucet and drain assembly
Courtesy of James Calloway

Step 3: Complete the Faucet and Fixture Installation

Slowly turn on the water to bleed off any air and check for leaks.
In our project, we installed a pedestal underneath the sink. In the case of a pedestal sink, make the mounting holes in the floor and remove the pedestal. Drill the mounting holes and insert the anchors. Replace the pedestal and secure it with lag screws. Secure the back of the sink with lag screws.
Attach faucet knobs if necessary. If not already installed, attach the stopper assembly in the drain hole. Work the pop-up rod to make sure it works properly.
Caulk any gaps between the wall and sink, forcing the caulk as deeply as possible into the gaps. Use a caulk that matches the color of the sink as closely as possible. Use a wet rag to wipe away excess caulk.

Step 4: Install the Drain Assembly

Apply a thick bead of plumber's putty to the underside of the new drain flange and press it into the drain hole. Insert the drain housing through the drain hole from underneath the sink (Image 1).
Screw the drain housing tightly to the drain flange, making sure there's a washer between the nut and the rubber gasket on the flange (Image 2).
Once the flange and body are joined, tighten the nut on the body until the gasket is tight against the underside of the sink.
Note: The fitting for the pop-up control arm should face the rear of the sink after you finish tightening.
Drop the pop-up drain into place, keeping the hole for the control pin toward the rear of the sink. Insert the plastic washer and ball socket for the drain pop-up and screw these into place.
Wrap plumber's tape (Teflon tape) around the drain tailpiece to tighten the connection and screw it into place.
Mount the faucet onto the sink. Remember to use care not to over-tighten any of the hardware around a breakable sink vessel or bowl.

 Need help http://myorlandohandyman.com
Saturday, March 8, 2014

What kinds of jobs can a handyman perform?

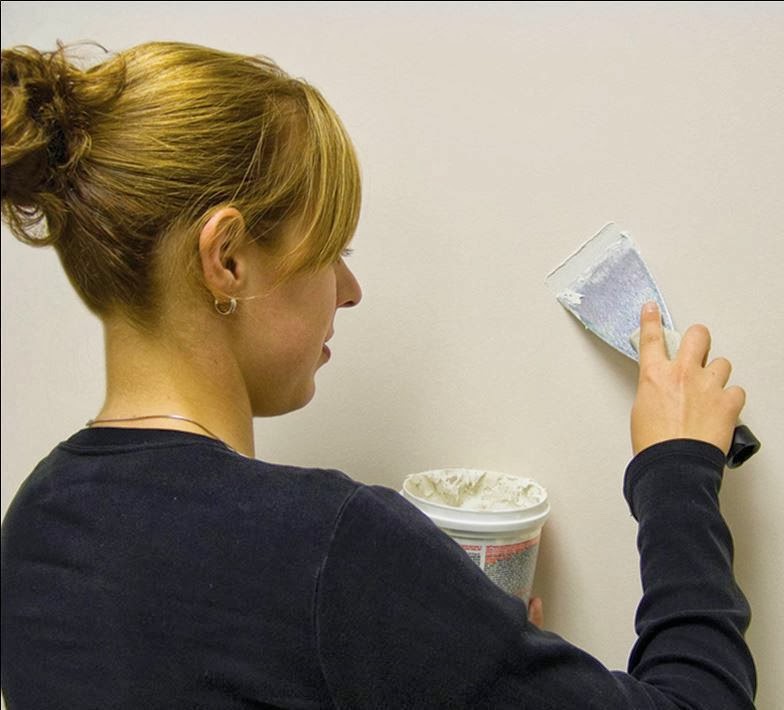
Some common jobs that a handyman might be hired for would include drywall repairs, paint touchup, replacing a bathroom vanity, replacing damaged boards in hardwood flooring, fixing a dripping faucet, replacing damaged pieces of siding, installing a shower door, or fixing a door that does not latch properly.

Many handyman services are willing to perform almost any task that you will pay them for. Some less common jobs that handyman services may perform include gardening or landscaping, assembling furniture or tool shed kits, changing hard to reach light bulbs, setting up Christmas decorations, hanging picture frames, or even house sitting for a family while they are on vacation. Some handyman services are willing to perform larger tasks such as building a deck, building a new addition, building a garage, or building a fence. Others like to stick to the small jobs like fixing a small hole in drywall, replacing screws in a door hinge, cleaning a clogged downspout, or replacing a piece of trim that has come loose. Some have more experience in certain trades than others. For example, one handyman might have extensive experience in finish carpentry while another worked for many years installing vinyl floors.
Orlando Handyman

 In some areas handyman services are not allowed to perform certain tasks such as electrical or plumbing. Some handyman services can subcontract these tasks out but often the customer will be responsible for hiring a licensed professional to perform these tasks. For example, if a handyman service were doing a bathroom remodel they might do everything necessary to get the job ready for plumbing. The customer would be responsible for hiring a plumber to take care of all the plumbing needed. Then the handyman service would return and finish the job. I have been told that a good handyman is worth their weight in gold (I weigh about 230 pounds if any one wants to send me that check). A good handyman has lots of experience and can do just about anything. If a good handyman comes across a job that they have not done before, they will learn how to do it before they try to do it on your house. A good handyman also can come up with creative solutions to problems to help keep your costs down. A good handyman should have an understanding of building practices that would have been used when older houses were built as well as building practices used today. reposted article by Eli Larreau

Monday, February 3, 2014

How to Replace a Light Fixture With a Ceiling Fan


Ceiling Fan installed by Orlando Handyman
Save heating and cooling costs by replacing an existing light fixture with an energy-efficient fan/light combination.

Step 1: Determine the Right-Size Fan 

The larger the room, the bigger the fan. Measure the longest wall in the room. If it is less than 12 feet, you'll need a fan that is 36-inches in diameter. If the longest wall is 12 to 15 feet, get a 42-inch fan. Anything over 15 feet, you'll need a 52-inch fan.

Step 2: Remove the Existing Light Fixture

Replacing a room’s chandelier or ceiling fixture with a ceiling fan that includes its own light fixture is an easy DIY project for anyone comfortable with basic electrical improvements. If the room has no existing fixture, this project is more difficult and entails cutting through the ceiling and installing new wiring and a switch.
To replace an existing fixture, first turn off electricity at the home’s main electrical panel to the circuit that powers the light and its switch. Cover the switch with tape to make sure it doesn't get turned back on while you are working (Image 1). Use a circuit tester to ensure that the power is off before you touch any of the electrical wiring.
Disconnect the fixture wires and remove the central mounting nut and any screws that hold the old fixture in place. With the fixture out of the way, try to determine whether the electrical box is securely fastened to a ceiling joist or support bracket. Fans can weigh up to 50 pounds and require a sturdy mount. If your ceiling box is enclosed by drywall or other material, you may need to access the joists from above, such as through the attic, to inspect it and attach a support brace if needed. Alternative installation methods are described below.

If you have access from above, you can make and install your own support brace using a length of 2x4 lumber nailed to the ceiling joists on both sides of the box location (Image 2). Position the brace directly above the ceiling box. From below, use wood screws to attach the ceiling box securely to the brace.
If you do not have access to work above the ceiling, you can install an expanding metal brace from below to support the ceiling box and fan. First, remove the existing box, then insert the brace up through the hole and secure it in position by ratcheting the mechanism into place. As the ratchet is turned from below, arms on the brace extend until they contact the ceiling joists on both sides of the hole (Image 3 demonstration). The spikes on the arms anchor securely into the wood. Some braces are available with a ceiling box attached, or you can attach the existing ceiling box to the brace.
This method also may be used to mount a fan on a ceiling where no electrical fixture was previously installed. After a hole is cut in the ceiling, electrical wiring is routed to the hole from a convenient nearby junction box, then the brace and a new ceiling box are installed as described above.

Step 4: Install the Fan Mounting Bracket


Most ceiling fans come with a mounting bracket; if yours does not, you can buy a mounting kit separately. Attach this bracket to the ceiling box following the manufacturer’s instructions. This bracket typically has a circular receptacle for a ball mount installed on the fan motor or extension rod.
Because mounting a fan too close to the ceiling restricts air circulation, an extension rod of any length is generally recommended. If you use an extension rod to suspend the fan, temporarily tape the ends of the fan motor wiring together and pull the wiring through the rod. Attach the rod to the fan motor, and secure the ball mount at the upper end of the rod.

Step 5: Connect the Fan Motor Wiring

Mount the fan motor to the ceiling bracket by inserting the swivel ball into the bracket.
Attach the fan motor wires to the house wiring. Typically, this requires connecting black to black (“hot”) wires and white to white (“neutral”) wires. If the fan has a bare copper or green insulated wire, attach this to the existing ground wire and connect both to the metal electrical box. Additional wires or a receiving unit may be included for an optional remote control operator, which allows you to control the fan and light without a switch or pull-chain. Follow the manufacturer’s wiring instructions carefully. Use wire nuts to secure all connections.

Step 6: Attach the Fan Blades

Install the fan canopy that covers the ceiling box and mounting bracket.
Attach a blade mounting bracket to each fan blade and then attach these brackets to the rotating bezel below the fan motor. Be sure all of the mounting screws are tight; loose blades will cause the fan to wobble when operating.

Step 7: Attach the Light Fixture


If your fan includes a light fixture, assemble the fixture and switch housing (if provided), then attach the fixture to the fan motor assembly. Connect the wiring according to the manufacturer’s instructions.
Install the glass dome, or decorative light shades and bulbs.

Step 8: Install the Wall Control Switch


Most fans are controlled by a rheostat-type wall switch that allows for basic on/off and fan speed operation. In order to reverse the direction of the fan, to circulate warmer air near the ceiling during winter months, homeowners have to manually operate a reversing switch located on the fan housing.
Some fans today include “smart” electronics that expand the various functions that can be controlled from a single switch, such as forward/reverse and light dimming, without requiring replacement or upgrading of the home’s existing wiring.
Before you install a new wall switch for your unit, recheck the existing switch wiring with a circuit tester to ensure the power is off. Install the fan control switch according to the manufacturer’s instructions.
Turn the power back on, and test the fan and light operation in all operating modes.


Story is complements of HGTV read more at HGTV

http://orlandoshandyman.com

Tuesday, May 21, 2013

Orlando Handyman say's The key is Preparation when "Painting"


What do you need home repair help with? A picture hung, a ceiling fan installed, or your bathroom remodeled. We are here to help you with all of your handymen needs. http://orlandoshandyman.com


Come in and chat with us, ask us anything. All Estimates are Free!
Orlando Handyman Painting Prep

Surface Preparation Guide
Incomplete or insufficient preparation is the single greatest cause of paint failures. All surfaces should be sound, clean and dry before painting. Use the guidelines below to prepare your surfaces for painting.

STEP 1
Remove dirt, grease, oil and chemicals

Dirt, grease, oil or chemicals may interfere with the adhesion of paint. Clean your surface with soap and water, household cleaner or trisodium phosphate (TSP) solution.

Do not use solvents to clean surfaces. Solvents tend to smear grease and oil and leave residue on your surface. Strong solvents can also soften a previous finish and make your new paint application susceptible to wrinkling.

STEP 2
Remove loose rust, as well as chipping or peeling paint

Create a smooth surface before applying your primer and/or base coat. Painting over loose rust will result in poor adhesion and an uneven finish.

Remove loose rust or paint by sanding or scraping your surface with a wire brush, sandpaper, steel wool or a scraper. Sand glossy surfaces lightly. Do not sand old paint that may contain lead.

STEP 3
Rinse and let dry

Rinse your surface and allow it to dry completely before applying a primer or top coat.

STEP 4
Apply a primer

Priming is recommended to increase the adhesion of your top coat to your surface. Priming also provides a thicker film buildup, which increases durability and creates a flatter and smoother surface for applying your top coat.

Priming is suggested on these surfaces:


Bare Metal
Priming makes your top coat adhere more smoothly to bare metal. Priming also adds to the rust-inhibitive function of your coating.

Bare Wood
Bare wood is a porous substrate that holds air and moisture. Priming is suggested to ensure a smooth, uniform top coat. Priming will also prevent bleeding from your wood. Sand off weathered wood and replace rotten or water-damaged wood before painting.

Concrete
Water-damaged concrete has a sandy or gritty surface that comes off easily when rubbed. Remove this loose material by sanding or etching. Prevent water or moisture from penetrating underneath your paint or peeling will occur.

Darkly Painted Surfaces
If you are changing from a dark coat to a light coat, prime in order to cover your old color completely. Priming also helps prevent bleeding of your old color through your new top coat.

STEP 5
Apply a top coat


Aerosol Application
Apply aerosol paints outdoors or in a well-ventilated area. Spray on smooth, even coats for a smooth, factory-like finish. Keep your can parallel to the surface of your object and move your can back and forth.

Brush Application
Apply brush paints with a high-quality brush or roller. For best control, hold your brush at the base of your handle (the end closest to the bristles).

STEP 6
Recoat if necessary

Follow recoating directions on your can. Apply a second coat of paint if necessary. Each product dries at a different rate. If you sand in-between coats, allow the full recoat time to dry before applying another coat (at recommended drying temperature).


Step 2


Step 3


Step 4


Steps 5 and 6


JOMAX® House Cleaner and Mildew Killer kills mold and mildew instantly while removing tough dirt and stains - without damage to the existing finish, or nearby plants or shrubs. And it’s economical! One gallon of JOMAX makes enough solution to clean a two story house.

 PRODUCT FEATURES: Kills mold & mildew fast! Cleans off dirt and stains Easy to use - No scrubbing necessary! Economical – one gallon makes 20 gallons of cleaning solution Can be used near plants or shrubs
 Reprinted from http://www.rustoleum.com/CBGResourceCenter.asp?sn=sur

http://orlandoshandyman.com 

Wednesday, February 20, 2013

Home Maintenance and Handyman Tips for Living by the Sea

It's a dream life for many, a seaside property, the sun and the sand. However it is a very hard environment for our houses. I own a property maintenance business in a coastal area of NSW Australia, which has given me a great deal of experience with these problems. Hopefully this article will help you identify problems that can occur living by the sea, and give you some guidance in how to prevent unnecessary damage occurring.
Gutters
I see a large number of rusted gutters and downpipes in this area. Rust is a common problem because of the high level of salt that end up on your house. However there are ways to increase the life of your gutters and downpipes. The easiest is to ensure the you clean or have your gutters cleaned at least twice a year. I recommend that gutters are cleaned at the end of Autumn, after the leaves have stopped falling and before the rain in winter, and again at the end of spring and before the fire danger period of summer. Clean gutters will allow the water to drain away and take with it any salt residue. Blocked gutters result in a build up of a salty silt that sits in your gutter and begins to corrode at the paint and metal.
Along with keeping your gutters clean, is making sure they still fall correctly. This means that there are no low points in you gutter where the water will pool and not drain away freely. In heavy rain you may notice your gutters overflowing in a particular area, this is an indication of a possible low spot or blockage. If you gutters appear crooked or uneven to the eye, then you should get them checked and repaired if necessary.
The next points relate to your choice of gutters and up keep. Ensure that you paint your gutters. Not only will this improve the look of your house, it will help to preserve the gutters. If having new gutters installed make sure you do your research. At $50+ per meter of gutter installed you want to make sure that you are buying quality gutters that come with a warranty.
Screen doors, fly screens and security doors
Just like gutters, screen doors, fly screens and  screen doors, are susceptible to rust. But you have bought marine grade stainless steel? While this is a great product, stainless steel does rust. Make sure from time to time you wash your security or fly-screen doors. When replacing fly-screens opt for a nylon based mesh. Although it is not as tough as a wire based product it will have a longer life in a coastal environment
Locks
I have been asked to deal with a number of sticky locks. Coastal environments are very humid. Along with salt residue, a build up of dust inside the lock turns to a virtual glue when combine with the moisture from the air. Generally this is something I only see in old locks or locks in beach front streets. Never be tempted to spray WD40, de-greaser or an oil based lubricant into the lock. Although this may make the lock work in the short term, it will attract more dirt and dust and the lock will seize again. Often the lock just needs a small amount of graphite powder, a carbon based dry lubricant. This will usually get things moving again. If necessary the barrel may need to be removed and be cleaned before the lock returns to normal
Shade sails, umbrellas and fabric awnings
Shade sails, umbrellas and fabric awnings have become a popular and practical architectural feature of many houses. The shade they provide while allowing light and air movement are fantastic. They are also relatively cheap, available in a never ending array of shapes, sizes and colours, and can be taken down or wound in for the cooler months. Wind is the number one enemy of these shade systems. As a licensed shade systems installer, I am aware of the massive forces that they catch. Shade sails are called sails for a reason, and I have seen many a fascia and guttering pulled away, windows broken, sails torn and other damage from a combination of incorrectly installed or incorrectly tensioned shade sails. Unfortunately it isn't as simple as stringing the sail up between a couple of post and screwing it to your house. It is an achievable DIY project but I would emphasize the importance to study up and talk to people about installing them. They may be relatively inexpensive, but they can cause a lot of expensive damage. In relation to umbrellas and awnings - DON'T FORGET TO WIND THEM IN OR TAKE THEM DOWN - they are easily damaged and often repairing them is very difficult and expensive.
Fencing
Fencing is the last thing I will mention. I see a lot of rusted fences because the bottom sheets are in contact with the ground. Most manufacturers specify a particular distance that the panels should be installed from the ground. It is well worthwhile following these directions. I also see a large number of crooked fences that have moved over time. This is often due to the sandy nature of the soil. It is something that is difficult to address, but often installing larger posts deeper into the ground or concreting every third post for example may address the problem and prevent it from occurring. Other issues are things growing up against the fence and pushing it over, or in the case of vines, pulling it down. Again make sure you maintain your fences. Painting or oiling will extend the life of paling or wooden fences. Washing colorbond or other metal fences can also help to extend the life of the fence, although correct installation and installing quality fences with long warranties is probably the best option in my opinion.
So hopefully this has helped some people, or opened their eyes to a few issues that their homes face on the coast. We live in a great environment and with a little work we can avoid the extra hassles that may come up.
Brendan is the owner of Just Fix It Property Maintenance, on the Central Coast of NSW Australia. You can visit the website http://www.justfixitpm.com.au to see the range of services provided by this professional company.
Article Source: http://EzineArticles.com/?expert=Brendan_E_May

Orlando Handyman Tips


 Your Home Is A Huge Asset, proper home maintenance has been proven to help keep your investment safe. Making home repairs as they are detected can help you keep home repair costs down. Orlando Handyman tips and articles to help you maintain your home.

Proper  Maintenance for Orlando Homes